If you’re interested in the sustainability of a cob home, you might be wondering how best you can utilize bottle windows.
In this article, we’ll be taking a look at what bottle windows are and how you can make them.
What Is A Cob Home?
A cob home is one of the most sustainable houses. They look like they came from Lord of the Rings.
They’re made from clay, sand, and straw. They’re not synthetic materials; all components must be mixed with water.
Looking at how they’re built, you may already be able to see how sustainable they are.
With natural thermal regulation, the walls soak in heat to keep you cool on hot days and release that heat when it reaches nightfall.
They’re also surprisingly durable and incredibly resistant to fire. If you have a cob house, you’ll know that it doesn’t have synthetic materials used in construction.
However, you might wonder how to make it more sustainable and unique. That’s where bottle windows come in.
What Are Bottle Windows?
Bottle windows are as they sound. You just use glass bottles to make your window. They’re a popular idea for cob homes, with one house having windows built from the ends of their bottles.
There are two types of bottle windows. Sometimes, people have melted down their glass bottles to create stained windows or even entire bottles embedded into a frame.
We’ll take a closer look at ways you could add bottle windows to your cob home.
How Can You Add Bottle Windows To A Cob Home?
The best thing about cob homes is that you can make your windows and doors or buy them. So if you want to build your windows, you can do so easily.
After all, cob windows don’t have a different frame, so that you can have fun with the process.
Embed Your Bottles Into The Wall
You could embed your bottles into a wall depending on how artistic you feel.
You can have them face both upwards and downwards, ensuring they stay where they are by putting layers of wall between them.
You could put the first layer of bottles facing upwards and put some of your cob material beside them. Then, add the next layer, so they’re facing downwards.
You can do this as many times as you like until you’ve filled the window.
Once that’s done, you’ll find that the light will filter through the bottles and provide varying colors based on the bottles you use.
Carefully Place Your Bottles Inside The Wall
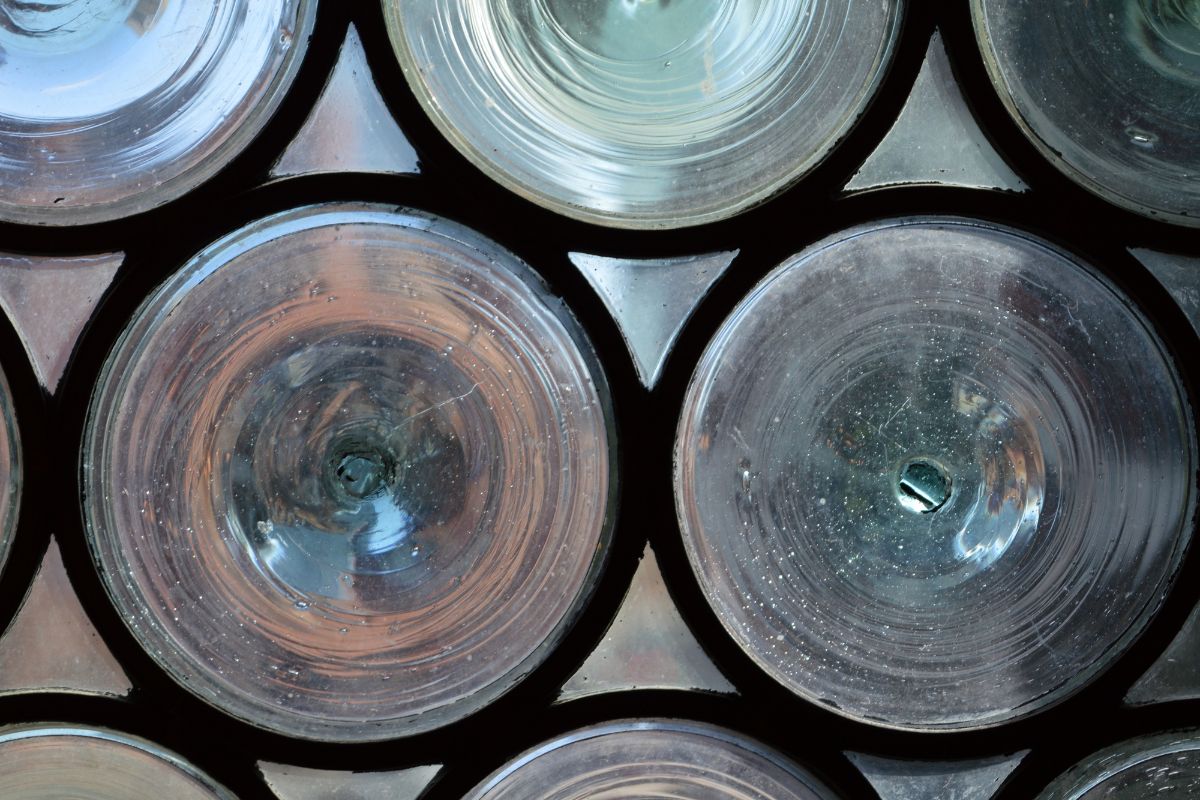
If you have various bottles, you could carefully place each bottle so that you have the ends of each bottle on the wall.
This differs from embedding the bottles in the wall because it won’t have a direct bottle shape.
Instead, you’ll find that you can create a series of circular window panels that emulate a stained glass effect.
However, it would be better if you used circular bottles for this project, as rectangular bottles may not give the same effect.
However, you could also use rectangular bottles instead of circular bottles.
Ideally, so long as you use the same kind of bottles, you can experiment with them to see how they would look in your cob home.
Make A Stained Glass Window Panel

If you don’t like the idea of filling in between each bottle with cob, you could always make a stained glass window panel.
Or, you could commission someone to do so for you. If you do want to make a panel yourself, you could do so with these steps.
Step 1
You should draw a design that incorporates the bottom of the wine bottles you want to use. Make sure you use the right designs and go from there.
Step 2
Using a bottle cutter, score the wine bottles around the bottom to remove them from the rest of the bottle. Heat the score lines with a propane torch.
Step 3
Dunk the bottoms of the bottles into an ice bath. The bottoms themselves should break off, but if they don’t, you just need to repeat the third and fourth steps.
Step 4
Smooth the edges with a grinder. Grab your scorer and a pair of breaking pliers and cut some flat glass pieces for your panel that fit with your design.
Step 5
Put your design on a lightbox. Then place a glass sheet on top of it. Mark which pieces you want to cut with a permanent marker according to your design.
Step 6
Score your glass and break it into pieces according to the design. Then place them on the drawing to ensure they fit.
Fit the bottoms of your wine bottle alongside the flat pieces of your drawing. Then grind and re-grind them, so they fit completely.
Step 7
Cut corners of the rough pieces so that the raised portions of the wine bottles can fit through them and rest on the flat glass.
Then mark it around the bottom. Cut and grind it until they fit against one another.
Step 8
Wrap the wine bottle’s bottoms around the edges and all of the glass pieces in copper foil, then burnish them.
Arrange all the wrapped pieces on your design and apply flux to your seams. Then solder the edges of your copper foil with a soldering iron.
Step 9
Cut the glass pieces for your border, arch the top, and add different colored glass pieces at each corner.
Then Apply the copper foil tape to the edges and burnish it to the glass. Then apply the flux and solder the border to the glass piece.
Step 10
Then, cut the brass edging with an electric saw and solder it to the panel. Once that’s done, clean the stained-glass panel with some glass cleaner and polish it.
Final Thoughts
As you can see, you can make bottle windows easily if you make your own cob home. Find the best version for you, and you’ll have a unique house that’s sustainable too.

Hi, my name is Joel Adams and I like to think of myself as a professional DIYer. Whatever odd jobs a person needs to be done around the house, I’m their guy.
I’m talking shelves, making sideboards and tables, painting feature walls… the list is neverending!
- How To Drill Into Brick? - October 31, 2022
- How To Repair And Refinish Hardwood? - October 31, 2022
- Floetrol – What Is It? When To Use It: Complete Guide - October 31, 2022